Secure VPN
Connection with FortiClient
Follow the step-by-step FortiClient VPN setup to securely connect to IzCloud infrastructure remotely. Set up your connection in minutes.
vpn.izcloud.com.tr
10443
VPN Connection Details
Information you need to establish a connection
Server Address
vpn.izcloud.com.tr
Port
10443
Username
CustomerID_username
Password
The password you set when creating the VPN user
Download FortiClient VPN
Download and install the FortiClient VPN application on your computer to establish a VPN connection.
Step-by-Step VPN Setup
Set up your connection with FortiClient VPN in minutes.
Download and Install FortiClient VPN
Download and install the FortiClient VPN application for your operating system from the download section above. You can accept the default settings during installation.
Create a New VPN Connection
Open the FortiClient application → Go to the Remote Access section → Click the + Add a new connection button.
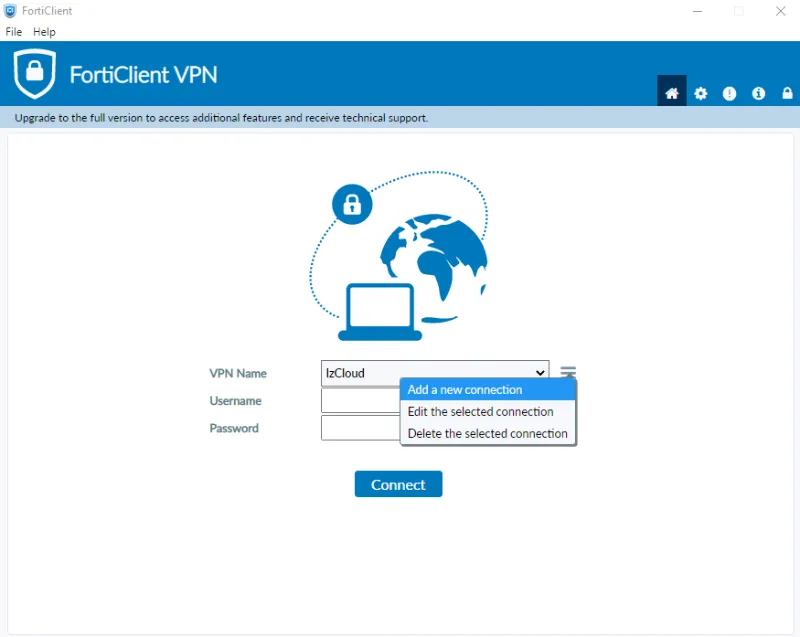
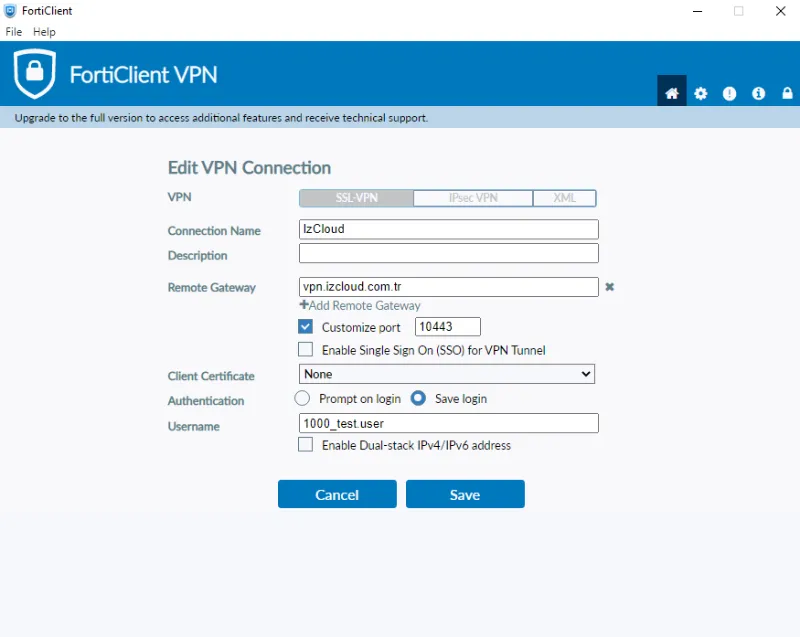
Enter Connection Details
Enter the following information in the window that opens:
vpn.izcloud.com.tr
10443CustomerID_username
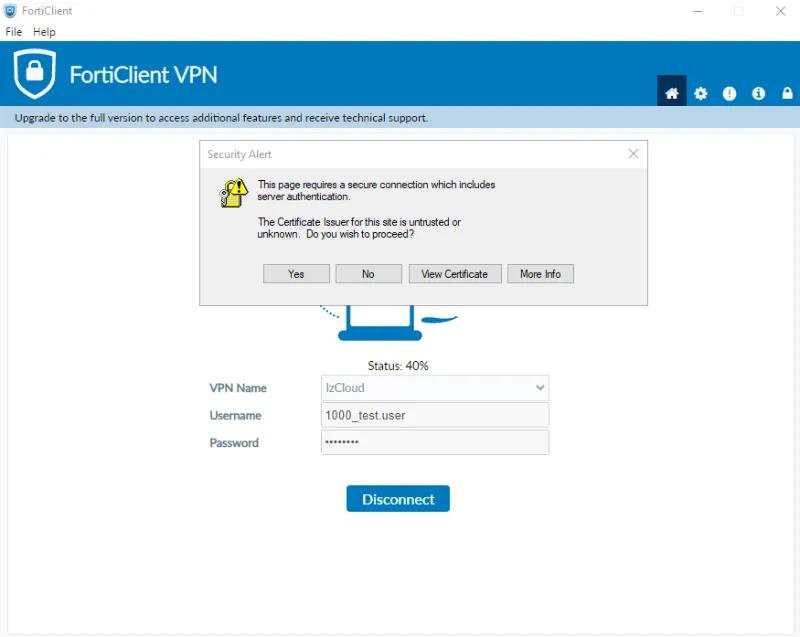
Connect to VPN
Enter your password and click the Connect button. If a certificate warning appears, click "Yes" to continue.
Connection Established!
You can now securely access the corporate network. Your connection is protected with AES-256 encryption.
Two-Factor Authentication (2FA)
You can enable two-factor authentication to make your VPN connection more secure. A 6-digit verification code is sent to your email address with each connection.
How to Enable 2FA?
- Go to the VPN → Users & Groups page in the IzCloud panel.
- Select your user and click the Edit button.
- Turn on the Two-factor Authentication toggle.
- Enter your email address and click OK.
- Enter the 6-digit code sent to your email when connecting to VPN. The code is valid for 60 seconds.
Frequently Asked Questions
Most frequently asked questions about VPN connections
CustomerID_username.Set Up Your Secure Connection Now
Access your corporate network securely from anywhere with IzCloud SSL VPN. Get started now.